Fine Art Photography by Per Berntsen
For more articles, click Technical articles on the menu.
Exposing a digital image
If your're reading this, you probably spend a lot of time editing your photos to make them look their best. But there is something you can do before you get that far to make sure that you are recording image data with the highest possible quality, namely giving the image optimal exposure in the camera.
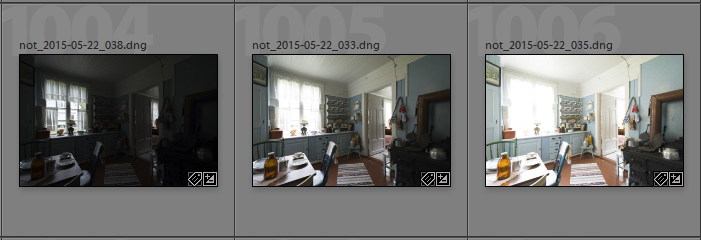
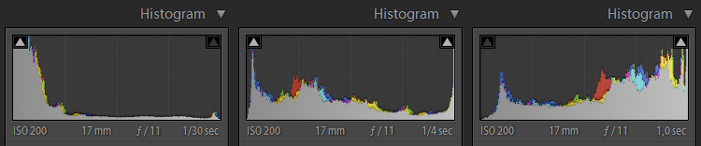
Consider the two images below and their histograms. They were used to create an HDR (high dynamic range) image. They are useless as single images, but can be used to illustrate the importance of optimal exposure..
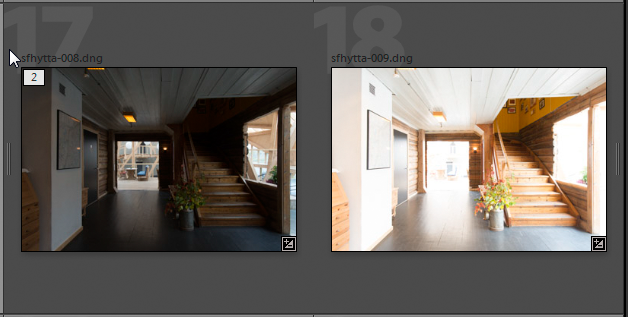
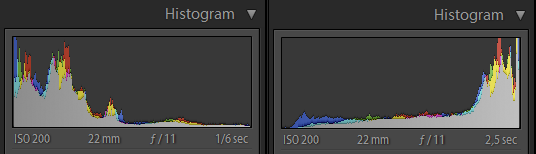
The image on the left on the left is badly underexposed, with the histogram bumped up to the left, while the image on the right is badly overexposed with the histogram bumped up to the right.
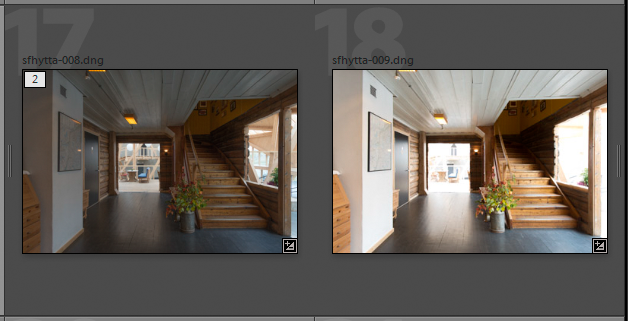

The left image was then given Shadows +48 and Blacks +100 in Lightroom, revealing the shadow detail.
The right image was given Shadows -18 and Exposure -1.30 to match the shadows of the left image.
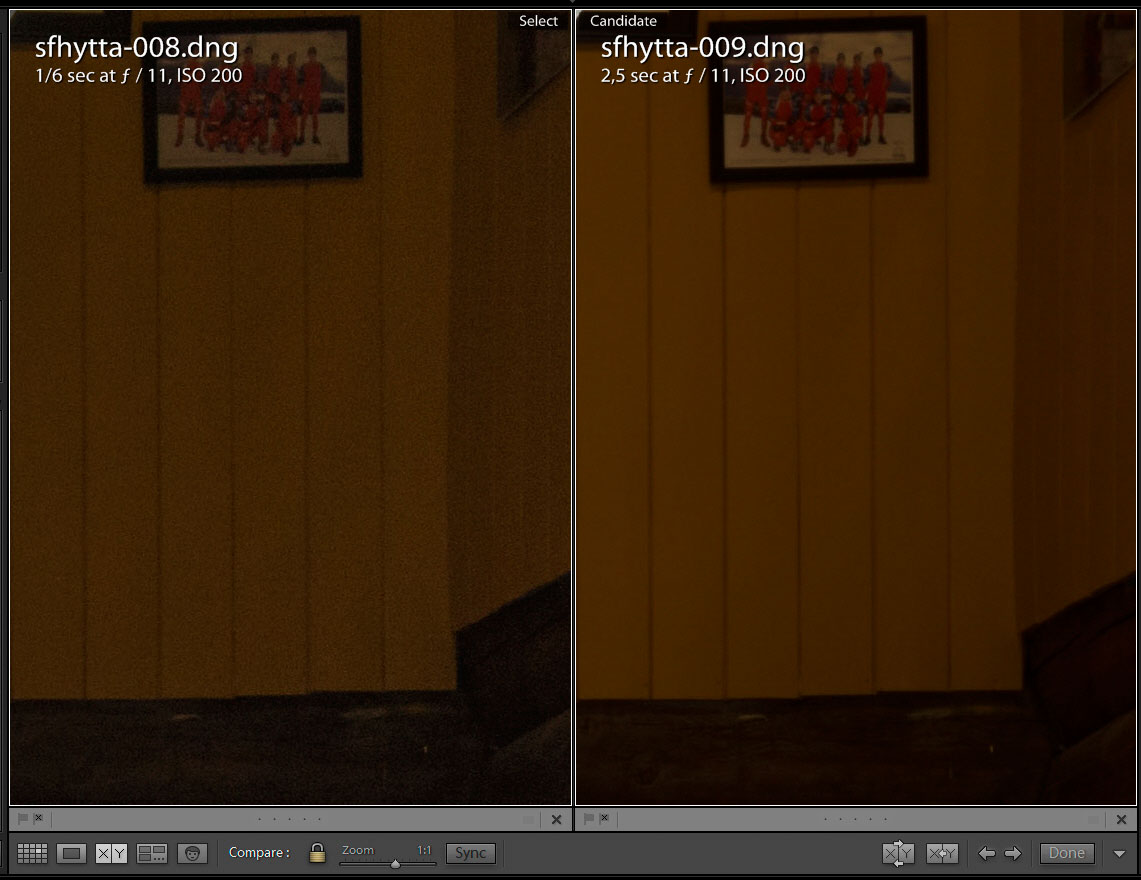
The shadows now match roughly, but when viewed at 1:1, some important differences are revealed. (to see this clearly, click the image to enlarge it)
Lifting the shadows in the image on the left reveals a lot of noise, and the yellow wall is a muddy color - there simply aren't enough levels to create a decent yellow. The image on the right is practically noise free, and the yellow wall looks much better.
The reason that this happens is that the camera sensor captures the highest number of levels (16384 for a 14-bit file) in the highlights, and gradually fewer and fewer levels towards the shadows. The number of levels is halved for every f-stop (exposure value) of reduced exposure. (Some cameras let you choose bit depth for raw files - for instance 12 or 14-bit. For best quality - especially in the shadows - choose the higher number.)
So by lifting the shadows, we are moving low-level information up on the tonal scale, which reveals the low quality. Doing the opposite, moving levels down on the tonal scale, which was done in the image on the right, will improve image quality. This is because we are moving high-level information to a position where it normally would contain low-level information.
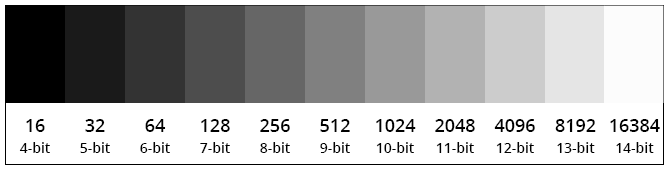
The graph above attempts to show the tonal distribution of levels and their corresponding bit depth with a 14-bit raw file and a camera sensor with a dynamic range of 10 f-stops. It is not scientifically correct, but should illustrate the point. (See What is a digital image for an explanation of bit depth and levels.)
Exposing To The Right (ETTR)
So, since there is an advantage to moving levels down, we can prepare for this when exposing the image, by making sure that the histogram on the camera is as far to the right as possible, but without clipping the highlights. Finding out how far to the right you can expose without highlight clipping requires some trial and error. The camera histogram is for the jpg preview, and may indicate clipping when there is no clipping in the raw file. Furhtermore, the histogram reflects the settings for shooting jpgs, so it's a good idea to set the jpg settings to "neutral" or similar. Also bear in mind that Lightroom/Camera Raw can retrieve some highlight detail in raw files, so even if the histogram is indicating clipped highlights, it may still be possible to retrieve them.
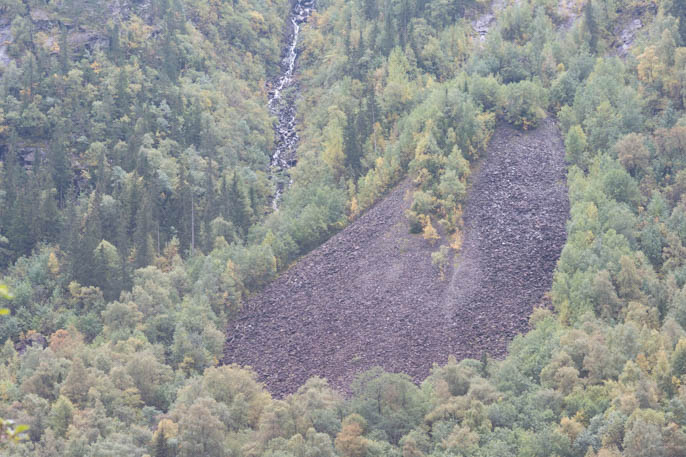
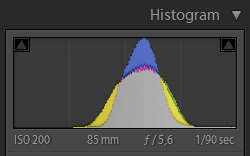
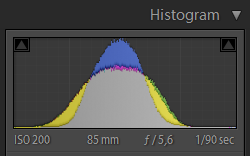
This image needs to be a little darker, and it needs increased contrast (blacks). But the exposure is optimal - the histogram is as far to the right as possible. There is no information in the shadows, which means that we can move high quality information from the midtones to the shadows. There is a little highlight clipping (a few small spots in the creek) that could be easily fixed with the Highlights slider.
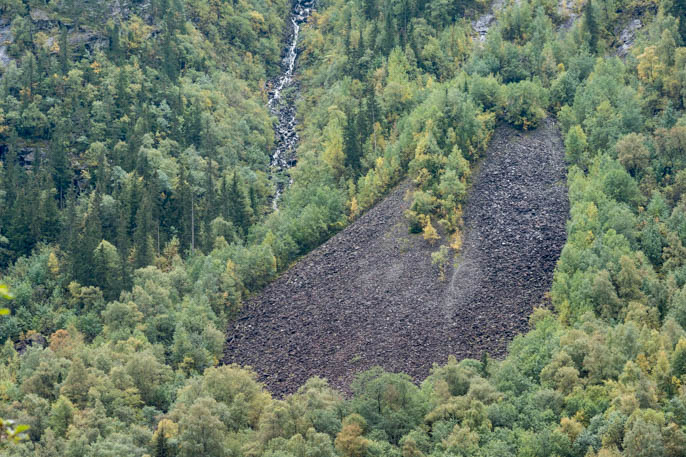
This type of low contrast subject is ideal for ETTR treatment. The shot was taken on a very dull day with a slight drizzle, and there is also some atmospheric haze - it was taken across a valley.
The rock dump consists of tailings from a water tunnel for a hydroelectric power station built in 1915 in the World Heritage town Rjukan, Telemark, Norway.
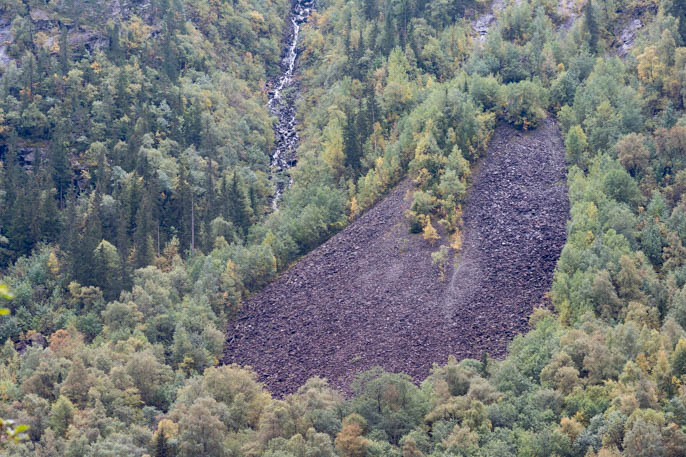
Setting Blacks to -65 improves the image considerably, and the histogram shows that midtone values have been moved to the shadows. The Exposure slider was not used, such a substantial adjustments of Blacks will also make the midtones darker. The image has a magenta/blue cast, and needs a little local contrast, and the upper part needs to be a little darker.
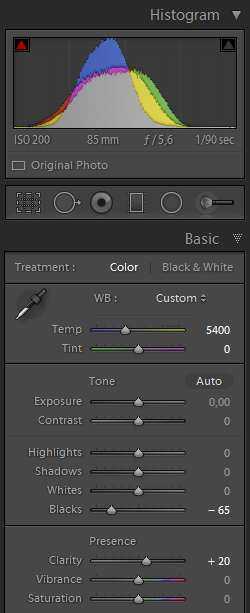
Changing Temp from 5300 to 5400 and Tint from -25 to 0 fixed the cast.
A Clarity setting of 20 increased the local contrast (no need to use Dehaze), and the red triangle in the histogram shows that it also has caused shadow clipping in the red channel. This has no ill effect on the image. The upper part of the image was darkened with a graduated filter with Exposure set to -0.20.
ETTR treatment doesn't fit every image or every situation. It is not always practical or possible to review the camera histogram after every shot. But the general advice is to try to avoid underexposure, which will lead to noise and poor color rendition in the shadows when the image is made brighter during editing.
And with high contrast scenes that only just fit within the camera sensor's dynamic range, the exposure will have to be spot on to avoid clipped shadows and highlights.
High Dynamic Range
When the dynamic range of a scene is higher than the dynamic range of the camera sensor, the image will have empty black shadows or blown white highlights, or both. The Photo Merge HDR function introduced in Lightroom 6/CC does an excellent job of merging different exposures of the same subject into one. The merged image is a fully editable 16-bit DNG raw file.
In most situations, only two images are required - one exposed for the shadows and one exposed for the highlights. The images can be shot hand held (which I never tried), but for best results I would recommend using a tripod. Keep the aperture constant, and vary the exposure time. Do not edit the source files - any editing should be done on the merged HDR file.
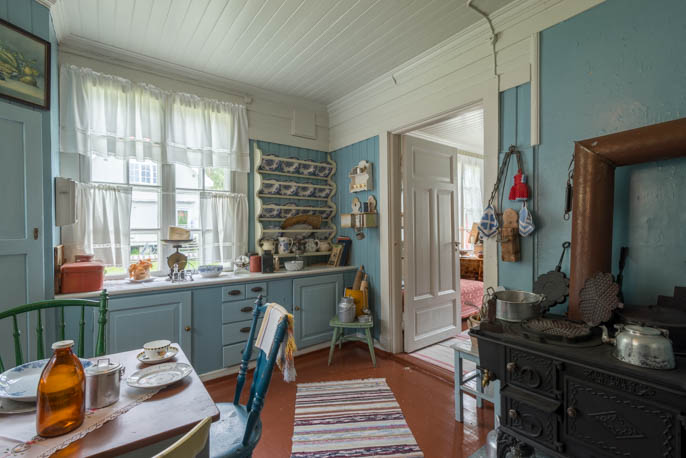
Interiors with windows shot in daylight are typical candidates for HDR treatment. The contrast in this scene is very high - there is a five f-stop difference between the shadow and highlight exposures. Using only two exposures worked well tonally, but there was noise in the higlights. Including a third exposure, between the shadows and highlights exposures eliminated the noise.
To create an HDR image in Lightroom, select the images in Library, and press Ctrl+H (Cmd+H on a Mac).
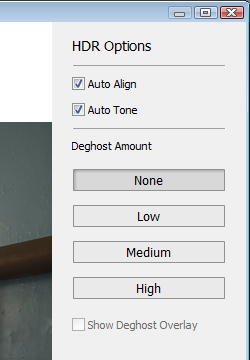
This brings up a preview with some options. I always keep Auto Align and Auto Tone checked, but the merged DNG is fully editable, so adjusting it after merging is no problem.
I never use Deghost, but I think it is used for masking objects that aren't present in all the source files. I guess it could also be useful for hand held shots.
If you can't locate the HDR file after merging, you probably have Sort order set to Added, in which case it will be last file in the Library. Set Sort to File name, and it will appear next to the source files.